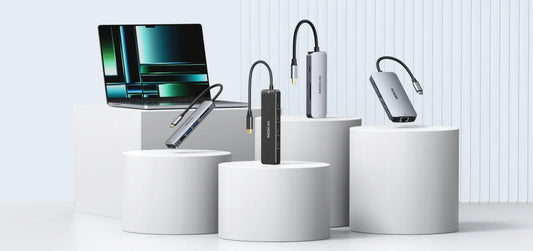
Tutorial | How To Connect A USB-C Hub To Your Laptop/PC?
Contents
Introduction:
——————————
In today's fast-paced world, having a reliable and versatile USB-C hub is essential for maximizing productivity. Whether you're a student, a professional, or a tech enthusiast, understanding how to connect a USB-C hub to your laptop or PC can significantly enhance your device's capabilities. This comprehensive guide will walk you through the process, ensuring a seamless integration of your hub with your device.
Video tutorial
——————————
The video shows you how to use an external monitor with your Windows or Mac laptop.
Here's a breakdown by timestamp:
0:00-0:08 The video starts with a shot of a laptop connected to an external monitor via USB-C port. A disclaimer is shown warning users to check their laptops' USB-C port compatibility before purchasing.
0:09-0:57 The video shows how to set up the monitor for Windows. The user goes through the settings menu and selects "Extend Desktop to this display".
0:58-1:40 The video shows how to set up the monitor for Mac. The user goes through the settings menu and selects "Mirror Built-in Display".
The video expresses how to extend your laptop's desktop onto an external monitor to increase your workspace and improve your productivity.
Step 1: Choose the Right USB-C Hub
——————————
Before you can connect your USB-C hub, it's crucial to select the right one for your needs. Consider the ports you require, such as USB-A, HDMI, SD card readers, or Ethernet. Ensure that the hub is compatible with your laptop or PC's USB-C port, which supports both data transfer and power delivery.
Step 2: Prepare Your Laptop/PC
——————————
Ensure that your laptop or PC is powered on and ready to use. It's also a good idea to close any unnecessary applications to prevent potential conflicts during the connection process.
Step 3: Connect the USB-C Hub
——————————
Locate the USB-C port on your laptop or PC. This is typically found on the sides of the device. Take the USB-C end of the hub and gently insert it into the port. You should feel a slight click as it connects. If your hub requires external power, plug the power adapter into an outlet and connect it to the hub.
Step 4: Connect Peripherals
——————————
Now that your USB-C hub is connected, you can start plugging in your peripherals. Whether it's an external hard drive, a mouse, a keyboard, or a monitor, simply connect them to the appropriate ports on the hub. If you're connecting a device that requires power, such as a hard drive, ensure that the hub can provide enough power or use an external power source for the device.
Step 5: Verify Functionality
——————————
After all your peripherals are connected, verify that they are functioning correctly. Check that your external devices are recognized by your laptop or PC, and that they are working as expected. If you encounter any issues, ensure that the devices are securely connected and that the hub is compatible with your system.
Conclusion:
——————————
Connecting a USB-C hub to your laptop or PC is a straightforward process that can greatly expand your device's connectivity options.
By following these steps, you can ensure a hassle-free setup and enjoy the benefits of having multiple ports at your fingertips.
Remember to choose a hub that meets your specific needs and to verify the functionality of all connected devices. With your new USB-C hub, you're now ready to tackle any task with ease and efficiency.
Preventing Future Frustrations
——————————
Let's keep those MOKiN experiences positive:
-
Understanding HDMI Alt Mode and MHL: Connecting Your Phone to a Display
-
Remember, not all USB-C phones support these standards, so always check before you buy!
-
-
Maximize Your HDMI Connection with These Proven Strategies
-
HDMI issues got you down? Don't panic!
Common problems like "No Signal",
incorrect resolution, or a black screen
often stem from simple causes.
-

MOKiN 13-IN-1 USB-C Laptop Charging Station with 2.26-inch LCD Smart Display


![[Troubleshooting] USB Hub Recognition Issues on Mac](http://mokinglobal.com/cdn/shop/articles/16.jpg?v=1715246398&width=360)


